Why bother with screenshot on Windows? They’re like the Swiss Army knives of the digital world. If you simply want to capture your entire display or just some area on the display, Windows 10 has built-in tools to take a screenshot for you.
If somehow windows 10 built-in tools did not work in your case, at the end of the article, we have recommended some third-party tools to snapshot on windows.
Print Screen on Windows (PrtScr): Your First Line of Defense
- Press PrtScn or PrtScr on window, and your screen surrenders. But where does the screenshot go? We’ll reveal the secret handshake.
- Pro tip: If you’re on a laptop, you might need to bring in the “Function” key for backup.
You can take a screenshot on windows 10 by just simply using the PrtScr on your keyboard. After pressing Prtscr, it’ll be copied to your clipboard and hence you can simply paste it anywhere you want, for example in Microsoft Word or in Paint.
You can find the PrtScr on top row of the keyboard. Depending on keyboard type, it can also be look like “PrtScn,” “Print Scr,” “PrintScr,” or “PrntScrn”.
How to Save Screenshot on Windows 10
After taking windows screenshot by pressing PrtScr, follow the below steps to save your screenshot in windows as PNG or JPEG file in any folder you want.
- Open the built-in Paint tool in Windows 10
- Press Ctrl+V to paste your screenshot in Paint tool
- Click on File > Save As >. Give the name to your screenshot, Choose the from left side and save it in any format you want, for example as PNG or JPEG.

Screen Capture in Windows With Windows + Print Screen:
This combo saves your screenshot as a PNG file. It’s like Batman and Robin, but less brooding.
Location alert: After taking a snip on windows 10, you may want to locate the file for future reference or sharing. By default, screenshots are saved in the “Screenshots” folder within the “Pictures” library on your Windows 10 device. You can access this folder to find and manage all your captured screenshots.

If you are taking multiple screenshots in windows, it will be saved as “Screenshot (1)”, “Screenshot (2)”, “Screenshot (3)” and so on.
When you press Windows logo + PrtScr, your screen will dim for a while just to make sure that screenshot has captured.
Tablet or 2-in-1 Convertible? Power+Volume Down!
- For those fancy touchscreen devices, this shortcut is your golden ticket. Windows logo button? Nah, just go Power+Volume Down to screen capture in windows.
Screenshots on Windows with Snip & Sketch
Snip & Sketch:
- It’s like Leonardo da Vinci meets your screen. Open it from the Start Menu (look for the “S” shortcut).

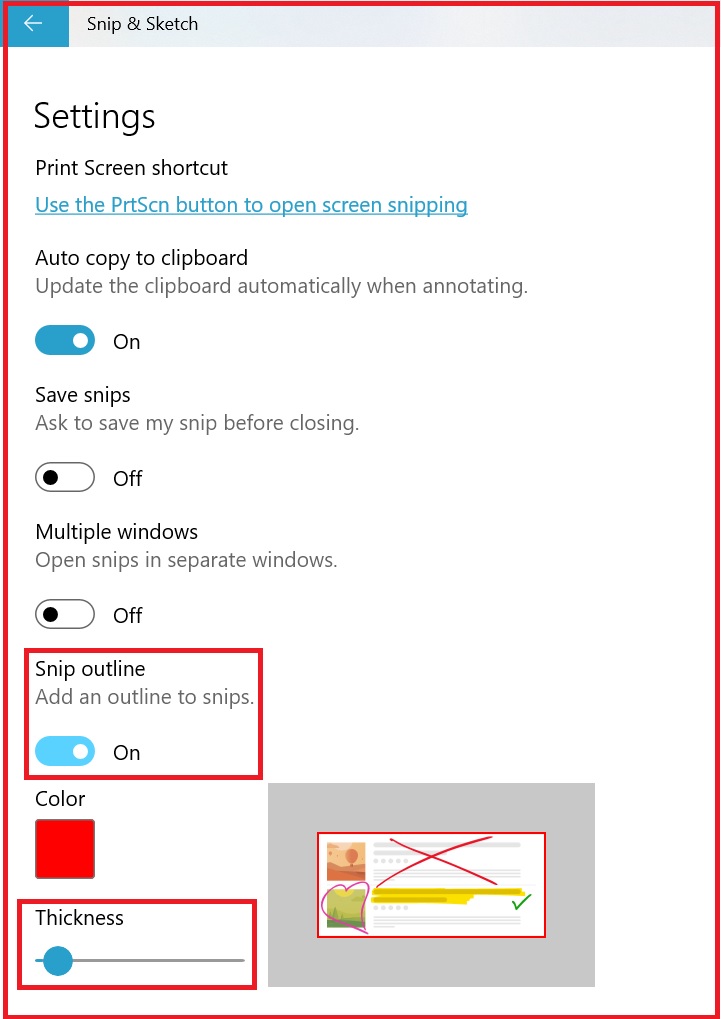
- Settings magic: Click “See more,” then “Settings, ” and find “Snip outline,” and turn it on. Voila! Now your screenshots wear fancy borders.
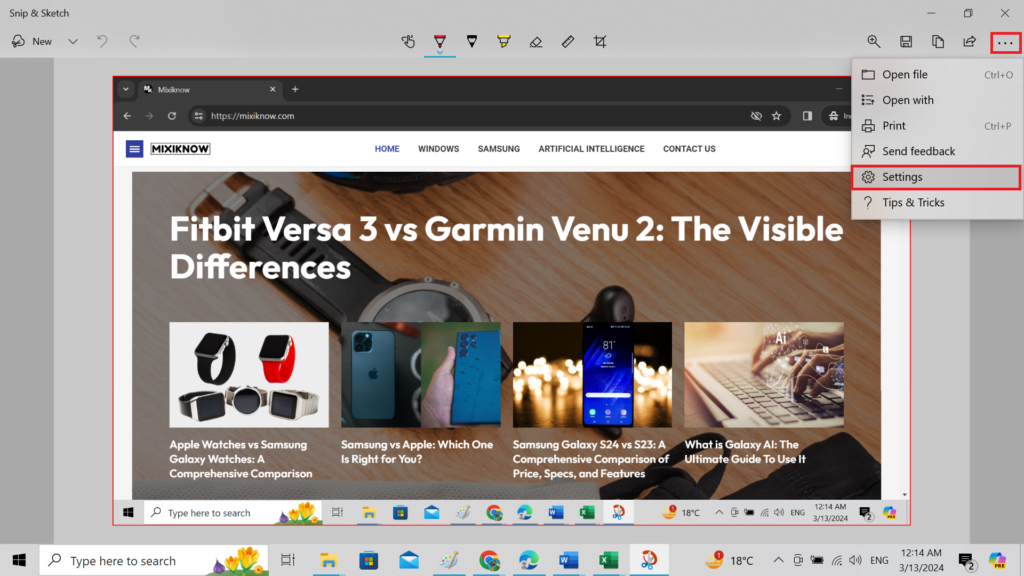
Why bother? Clarity, my friend. No more screenshot camouflage. Plus, it’s artsy—like adding a mustache to the Mona Lisa.
Snip & Sketch (Windows + Shift + S):
Press Windows + Shift + S shortcut key to open Snip & Sketch more quickly. When you open the Snip & Sketch tool using shortcut key, your mouse icon will turn into plus icon shape, and you will also see 5 buttons bar at the top your laptop. These all 5 options are also available in Classic Snipping Tool which is still supporting by Windows 10. However, Snip & Sketch tool is more modern and simple.
- Rectangular Snip
- Freeform Snip
- Window Snip
- Fullscreen Snip
- Close Snipping
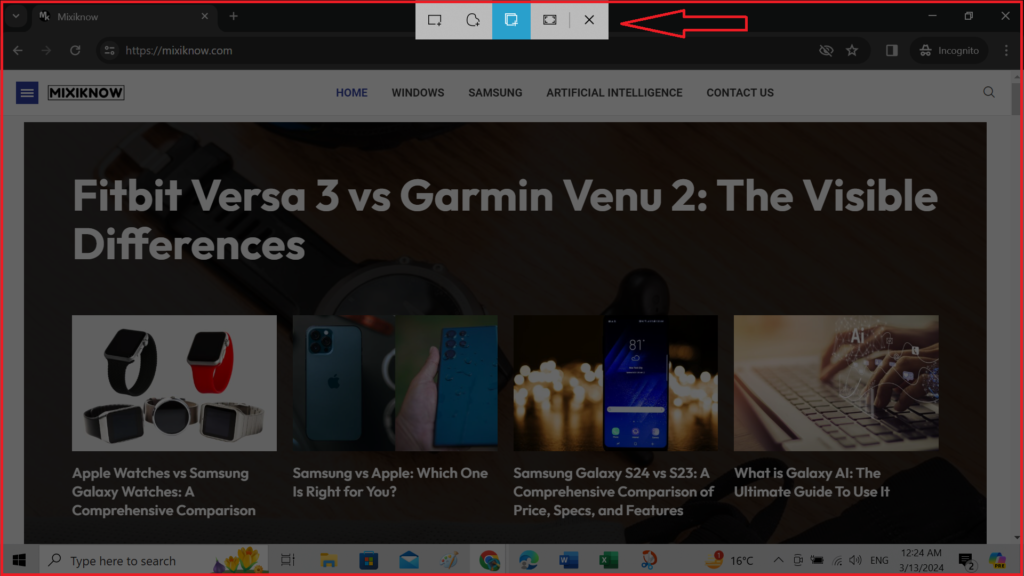
Let’s see what these buttons bar do,
1. Rectangular Snip: Select this option, drag the mouse, and draw a rectangle around the area which you want to capture in windows and release the mouse, windows will capture that area as a screenshot.
2. Freeform Snip: Select this option, drag the mouse, and draw an outline on any shape or area which you want to capture. While drawing the outline, the area of your screen under the outline will become white and the area outside the outline will be grey.
3. Window Snip: Select this option and just click anywhere on the screen, it’ll capture a screenshot on windows. Wait! But where is that screenshot? The answer is screenshot will be saved in your clipboard and you can paste it in any application that can support image like Paint tool or Microsoft Word.
4. Fullscreen Snip: If you select this option, it’ll print windows screen immediately and your screenshot will also be saved in clipboard.
5. Close Snipping: Press Esc button on keyboard or just click on the 5th cross button on the bar to close the Snip & Sketch tool.
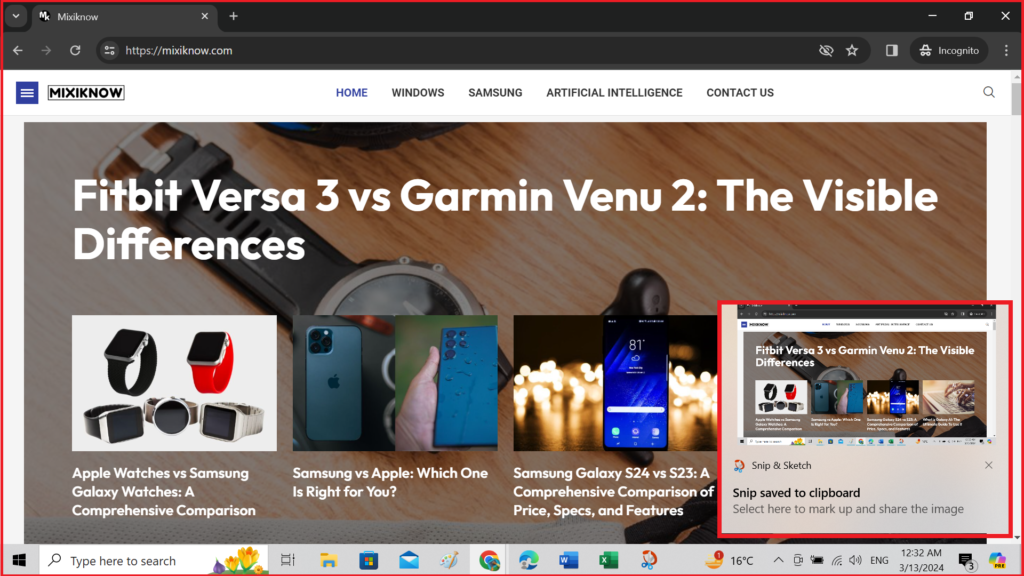
While Screenshot will save in your clipboard, at the same time, you’ll get the notification in bottom left corner, just click on it immediately and it’ll open in snip & sketch tool dashboard. You can save your screenshot from snip & sketch tool dashboard in PNG, JPG or GIF format.
Third-Party Heroes to Screen Print in Windows: Greenshot and SnagIt
- Greenshot: The Free Spirit
- It’s like a screenshot ninja. Capture specific regions, annotate, and even add a dash of unicorn magic.
- Why choose Greenshot? Because it’s free, and free stuff is like finding a forgotten $20 bill in your pocket.
- SnagIt: The Powerhouse
- Think of it as the Iron Man suit for screenshots. It’s got lasers, rockets, and a built-in coffee maker (okay, maybe not the last one).
- Why go pro? Advanced features galore—annotations, GIFs, and pixel-perfect precision. Plus, SnagIt by Techsmith makes your screenshots feel like they’ve been to a spa.
Conclusion
You’re now an expert in taking screenshot on windows 10. Go forth, capture, and conquer!